How to Install Windows 10 from a Bootable USB Drive
So, you go to re-install and realize your PC probably doesn’t have a DVD drive, and if it does… Where is that install media!?
Booting Windows 10 from a USB stick is actually pretty straightforward and can be installed from a USB drive without much fuss, that is once you have the USB drive setup!
Below is everything you need to know to put Windows 10 media onto a USB thumb drive!
What you need to get started?
Firstly the obvious, a USB thumb drive with 8GB or more storage capacity. And make sure it’s clear/empty of your important data as the entire thing will be erased.
Second is a Windows PC to perform the task.
Prepare the Windows 10 Bootable USB
Lets start by inserting your blank USB Thumb drive into the PC or laptop.
For this process we will use the Windows 10 Media Creation Tool, you can download this from the Microsoft Download Windows 10 page click on Download tool now.
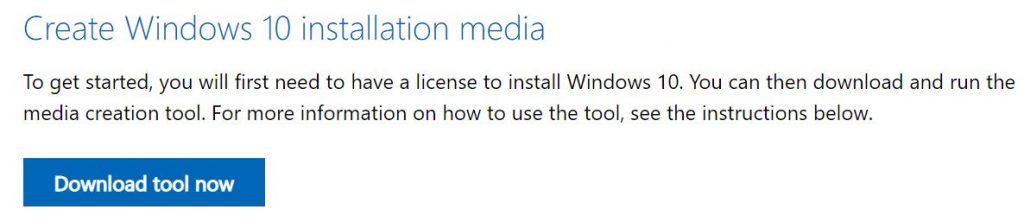
The file should save to your downloads folder, it is roughly ~19MB. Once downloaded launch the media creation tool and click Accept when prompted
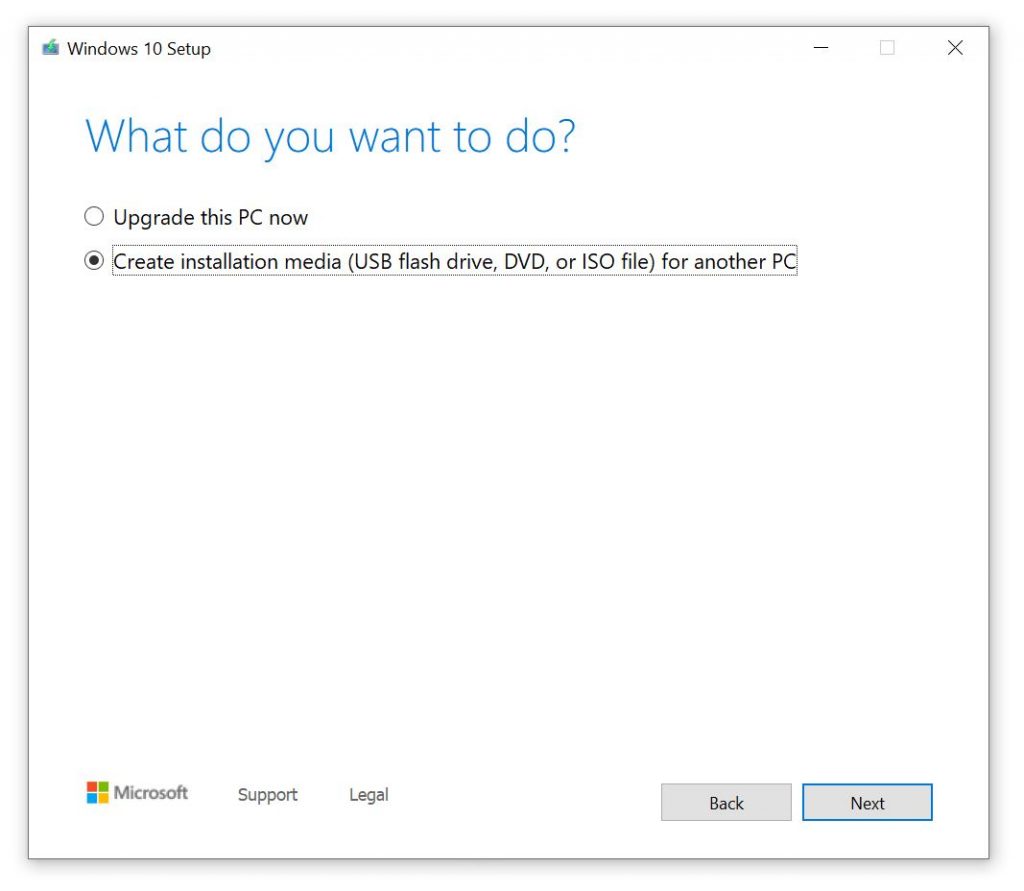
You will be asked to either Upgrade this PC now or Create installation media. We want to create installation media, then click next.
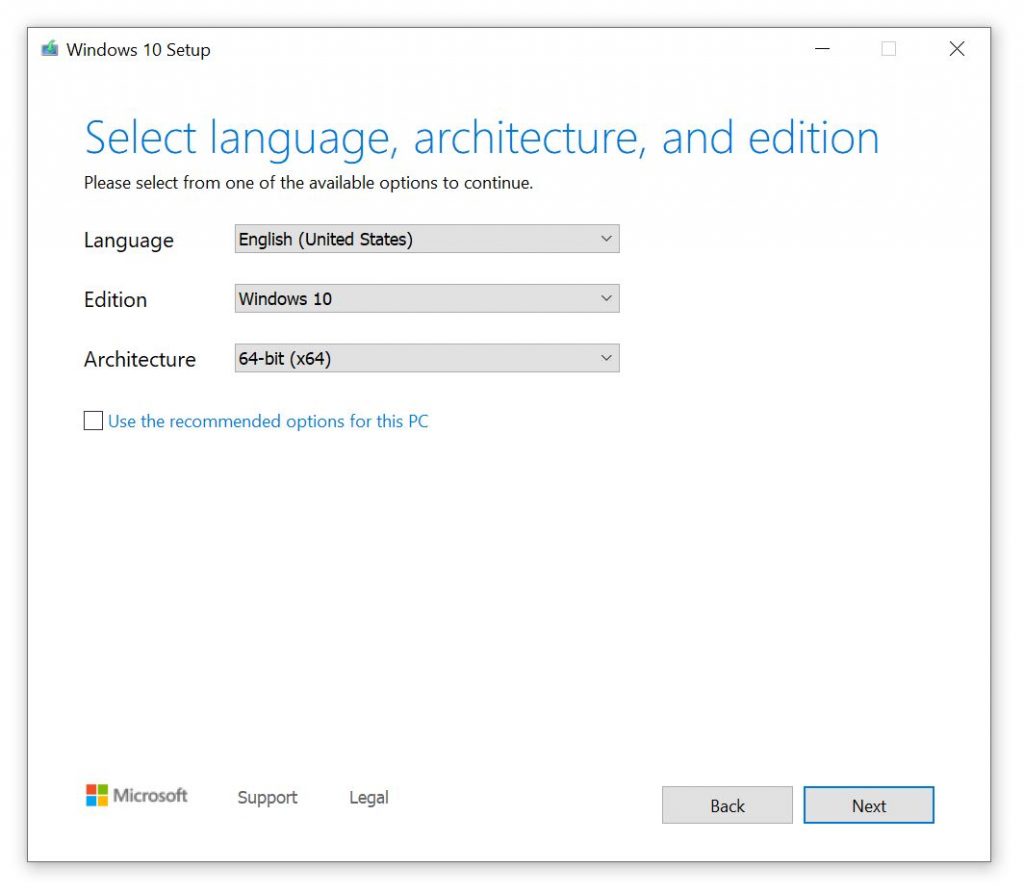
Select your preferred Language, Windows 10 Edition and system Architecture.
The settings may be unchangeable, if so untick the box labeled “Use recommended options for this PC”. Then click Next.
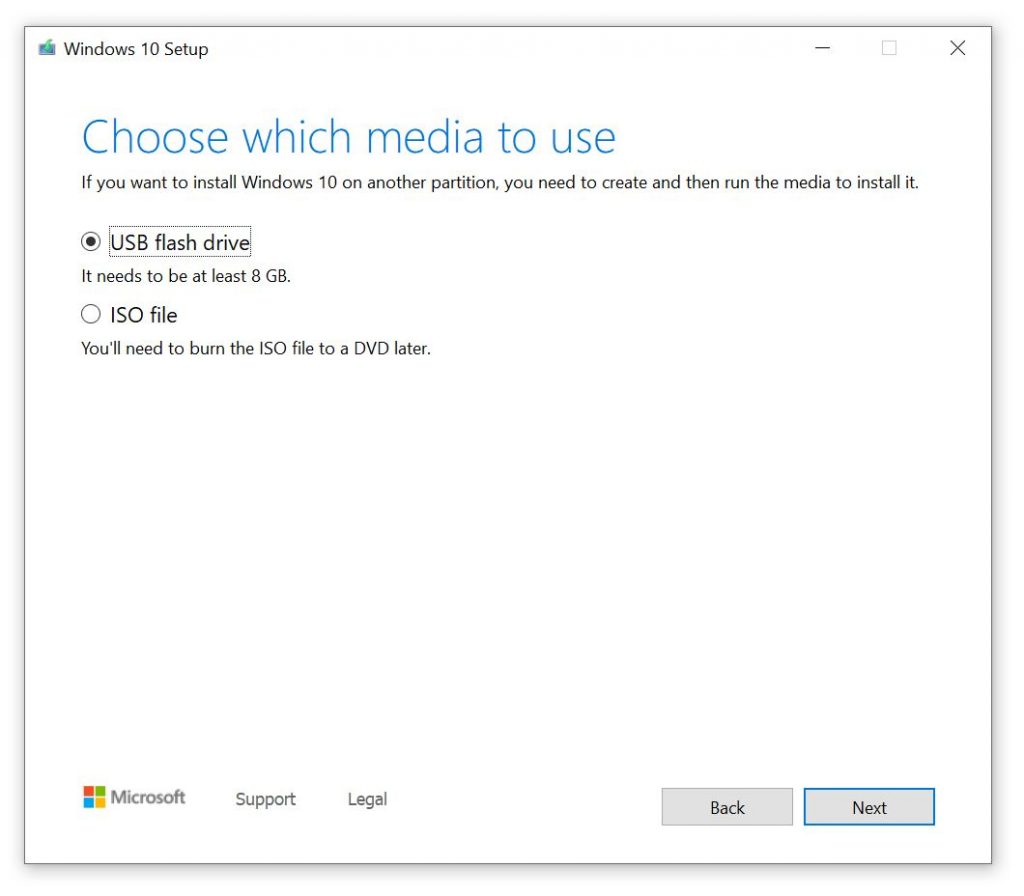
Choose USB flash drive on the next screen and click Next.
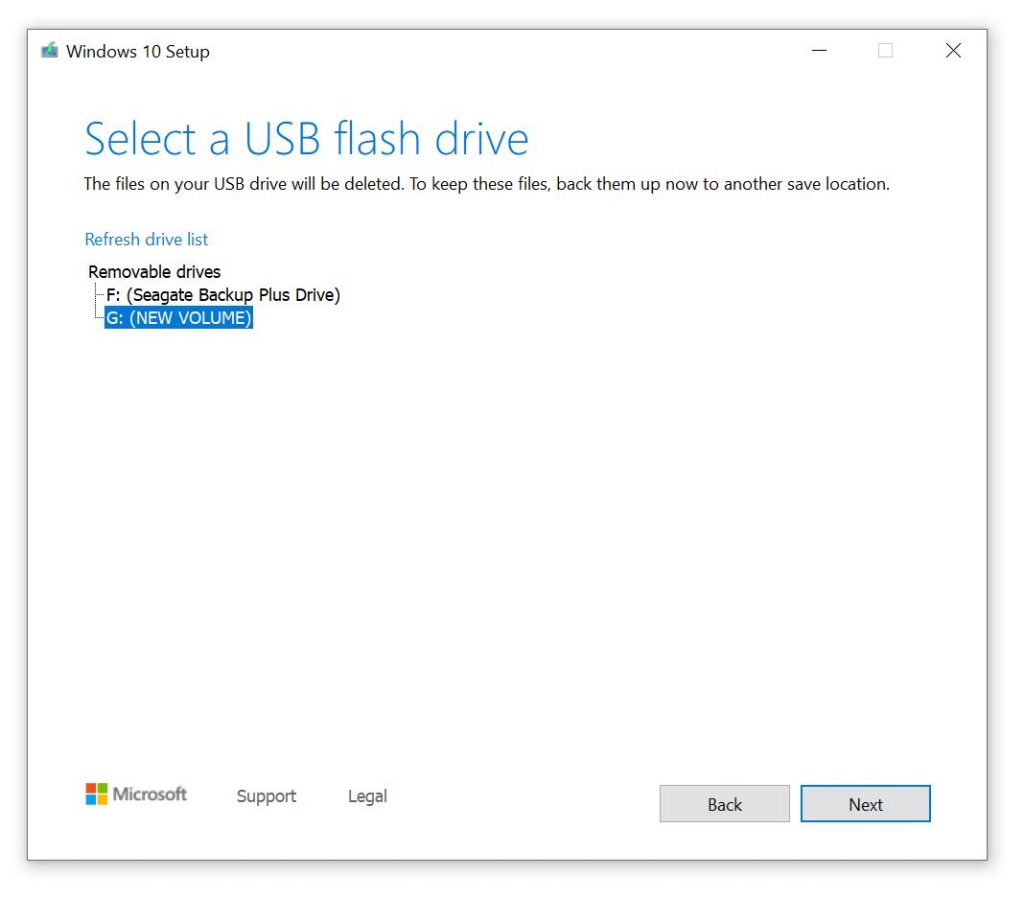
The next screen will look something like the below. In my case I have 2 Removable drives connected. my USB flash drive is connected as G: so I select that and click Next. Your’s will be something similar, just select your desired drive for the USB Bootable Media and click Next.
The bootable USB Windows 10 installer will now create the media. This will take some time depending on your internet speed but updates it’s progress as it proceeds. This will download several gigabytes so consider this if you are on very slow internet or a metered connection.

Installing Windows 10 with your a USB Drive
With your new installation media created, you can now proceed to installing Windows 10. The USB drive is now bootable, so all you need to do is safely remove it from your PC and insert it into the device for installation.
Power up the computer you’re installing Windows 10 on and wait for it to detect the USB drive. If this doesn’t happen, reboot, this time pressing the key to access the UEFI/BIOS or boot menu. Ensure the USB device is detected, then select it as the main boot device.
The next reboot should detect the Windows 10 installation media. You’re now ready to install Windows 10! Get started by starting the installation wizard.
Alternatively the boot process will often show you a “Show boot devices” button to press like F10 during boot up, when you press that you can select your USB Boot media from the list and press enter.
Once you’ve worked through the wizard, Windows 10 will be installed. Note that some installation may continue after you log in, so be patient. It’s also worth checking for Windows Updates (Settings > Updates & Security > Windows Update) after installation to ensure everything is up to date.
What to do after installation.
We highly recommend keeping the new Windows 10 Bootable USB drive safe and somewhere should the need arise again.